
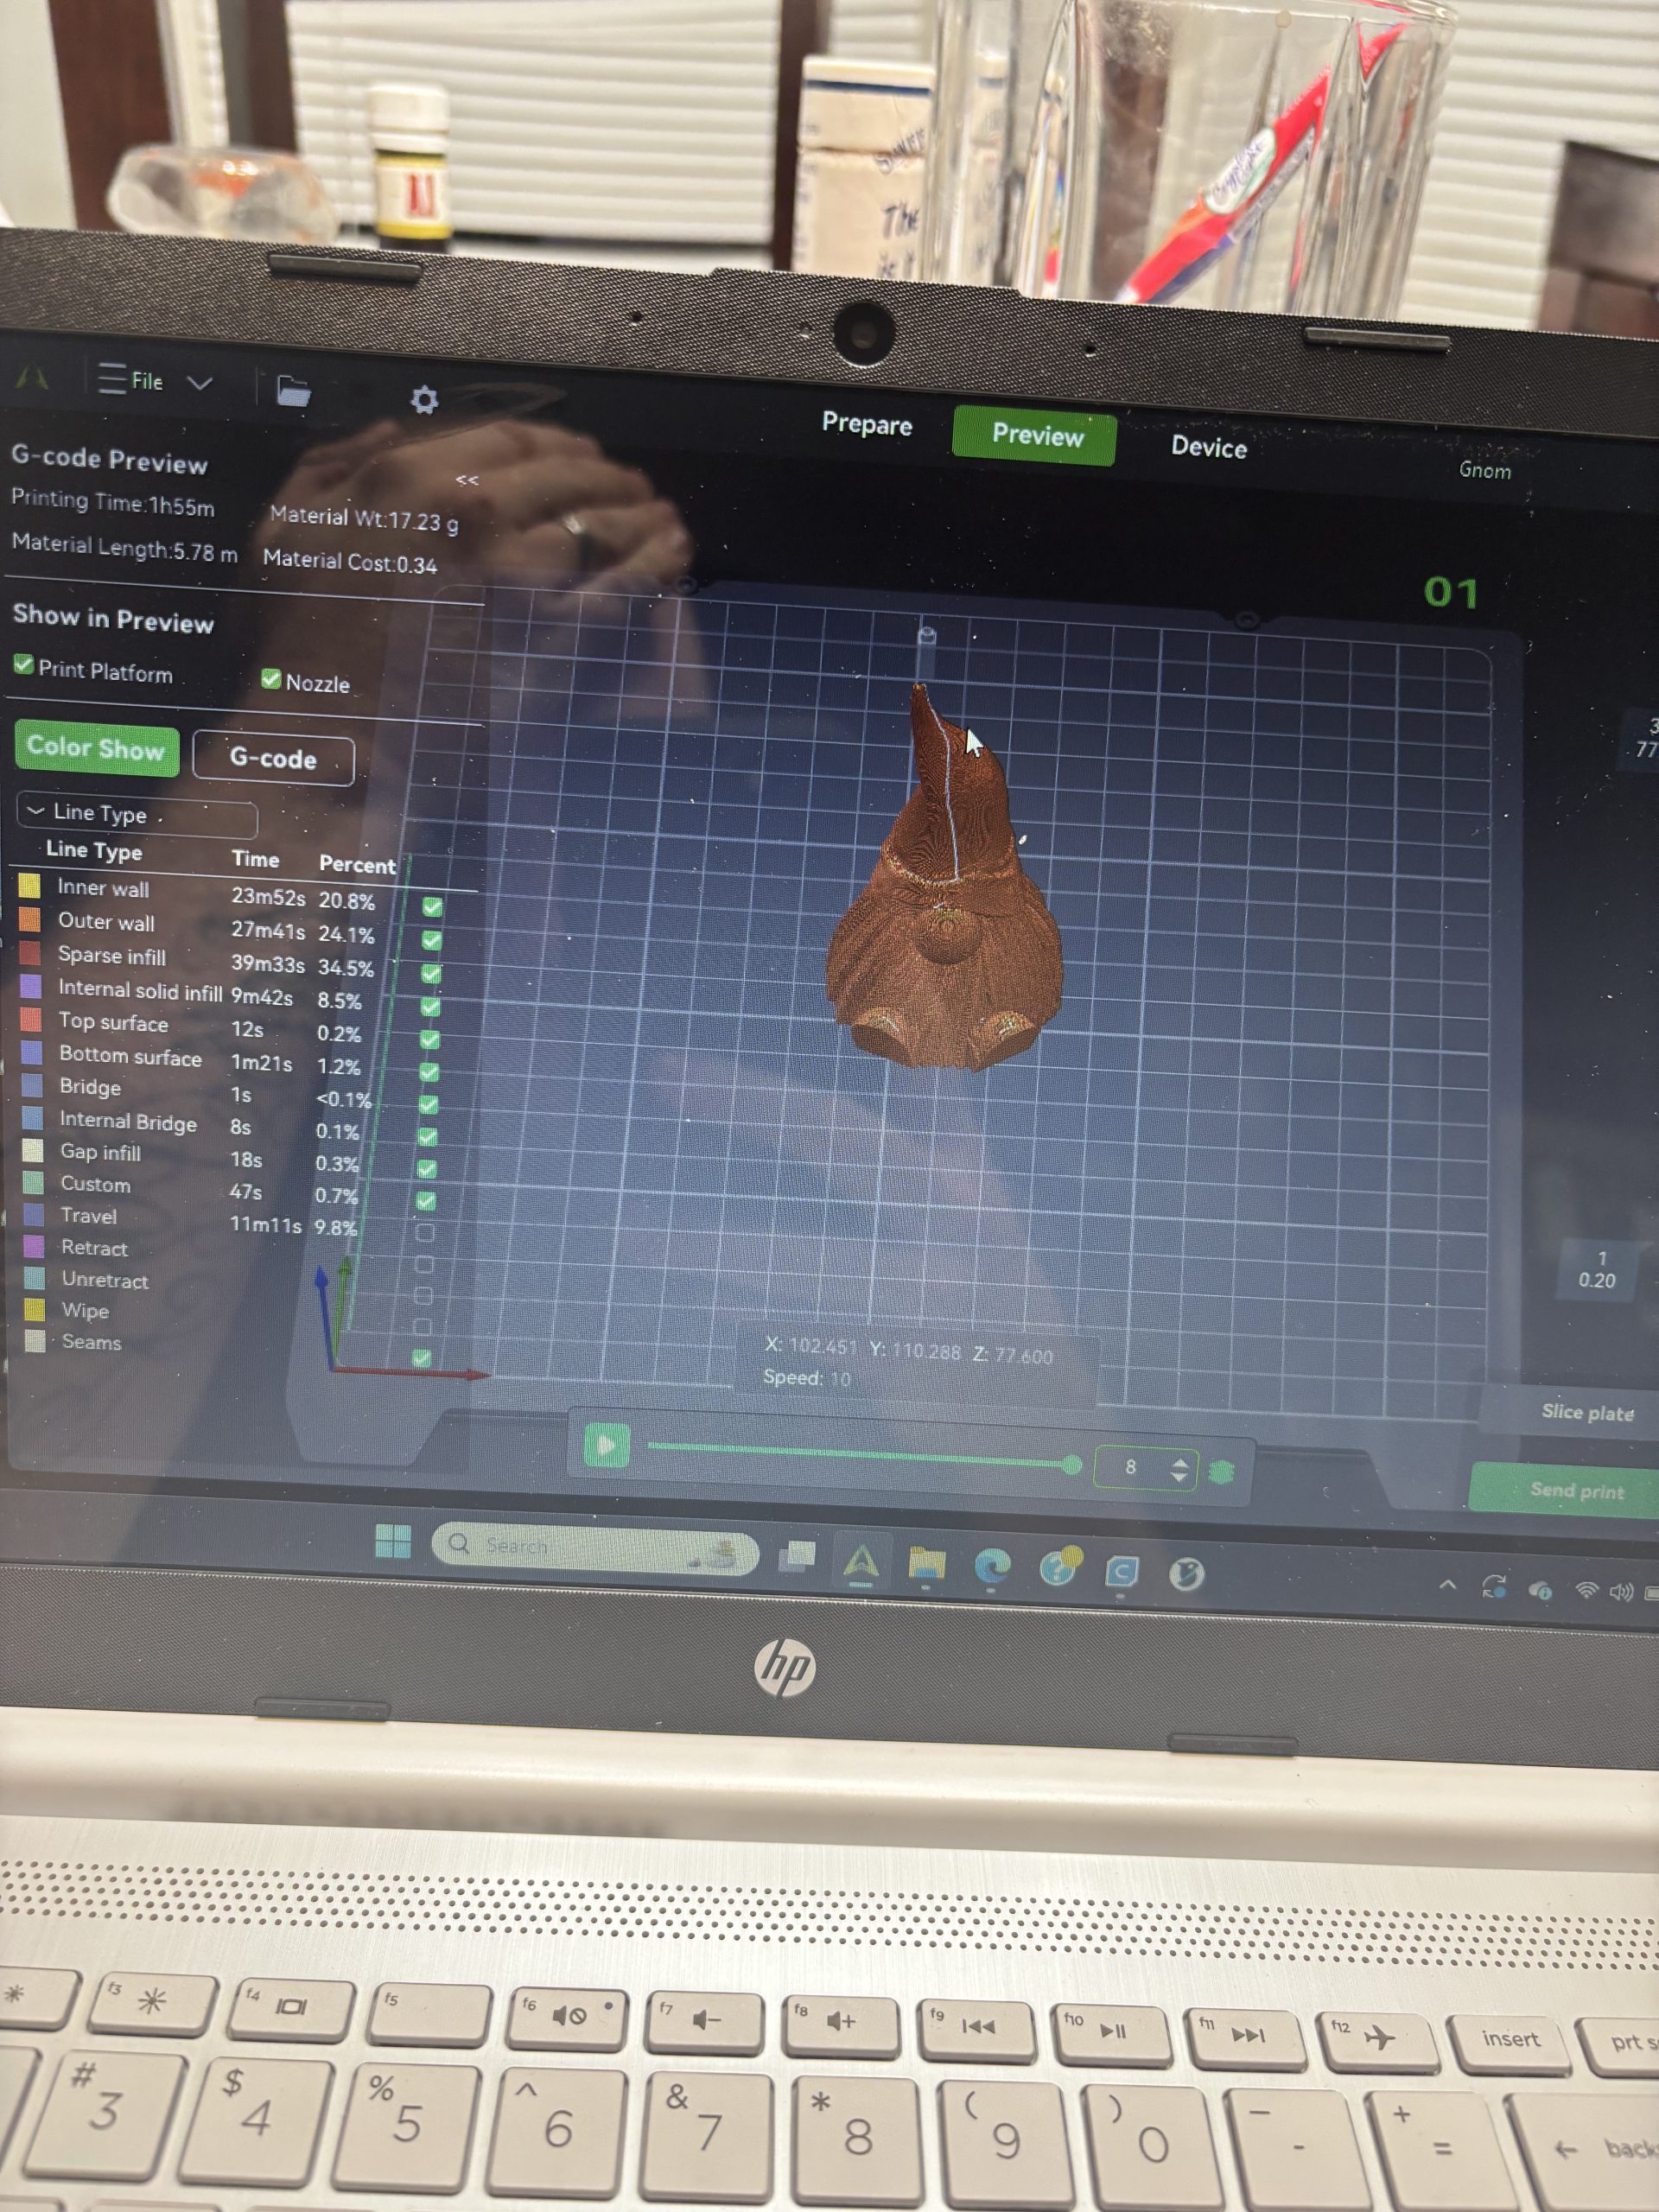
Trying to get rid of the seam
انضم إلى أول مجتمع عربي متخصص في الطباعة ثلاثية الأبعاد لتبادل الأفكار، حل المشكلات التقنية، واستكشاف أحدث الابتكارات في هذا المجال. سجّل عضوية جديدة الآن وكن جزءًا من منصة تجمع بين المبدعين والمبتكرين لصنع مستقبل ثلاثي الأبعاد!
انضم إلى أول مجتمع عربي متخصص في الطباعة ثلاثية الأبعاد لتبادل الأفكار، حل المشكلات التقنية، واستكشاف أحدث الابتكارات في هذا المجال. سجّل دخولك الآن وكن جزءًا من منصة تجمع بين المبدعين والمبتكرين لصنع مستقبل الطباعة ثلاثية الأبعاد!
Lost your password? Please enter your email address. You will receive a link and will create a new password via email.
Please briefly explain why you feel this question should be reported.
Please briefly explain why you feel this answer should be reported.
Please briefly explain why you feel this user should be reported.
Trying to get rid of the seam
To reduce seams in your 3D prints, try adjusting your slicer’s settings. Enable “Z-hop” to avoid dragging the nozzle across the print. Use a “seam position” setting, such as “rear” or “random,” to minimize visibility. Consider materials with better layer adhesion, like PETG or ASA, and experiment with different temperatures for optimal flow. Implement infill patterns that can help hide seams as well. Regular maintenance of your printer can also improve consistency. Happy printing! 😊
Hi Mikehall397 👋 and welcome to the 3D-Trabelshot Community! 🌍✨
Let’s start with what a Z seam is. When 3D printing, the printer lays down each layer of material in a continuous path. The Z seam is the point where the printer stops one layer and starts the next. This usually leaves a slight mark or “seam” on the surface of the print, which can sometimes be noticeable, depending on the model and settings.
Now, in Creality Slicer (or similar slicer software), you have control over where this seam appears:
1️⃣ Random: Scatters the seam in different locations, making it less noticeable overall but potentially rougher on the surface.
2️⃣ Sharpest Corner: Places the seam at the sharpest edge or corner of your model, where it’s less visible on smooth areas.
3️⃣ Back or Custom: Lets you manually control or align the seam to a specific area.
For beginners, I recommend trying Sharpest Corner or enabling the Hide Seam option (as shown in your screenshot). This will help the seam blend more naturally with your model while maintaining quality.
Hope this helps, and happy printing! 😊
Think I got it thanks for helping
You are welcome at anytime!